Thursday 15 January 2009

Boxes, photo albums and tea breaks.

The box making continued at a pace. I had made a small press from a car jack and some wood in the studio. It worked! the wood made it light enough to put in my case and did not send the security people at the air ports in to a state of panic. Pressing blocks were made so that the boxes could be pressed.

The fine looking man on the left is David Penton. David is a good friend and studio 5 member. He is also the person who after 2 or 3 glasses (it may have been more) of wine induced me to go to Anandwan ( I would have gone anyway I just wanted the wine, please do not tell him that though!) He is also the guy who has taken many, if not all of the images for this and our previous trip to Anandwan.


As the box project neared completion the students were able to realise that they could make boxes, and with a little more practice, good boxes at that. The aim was to use what we had on site, to make the boxes for a purpose... not just an empty exercise. It is intended that the boxes will be used to protect and display the units greetings cards. With further development who knows what else they will find to box... books... linens who knows.


The next project was to make simple photo albums. The construction was a basic self guarding ( self compensating ) fold and glue method.


If you remember the previous blog where we made book cloth? well here it was used to make the case for one of the styles of photo album. I think it looks good and it was top to to be able to see the students work coming together in this way... again no empty exercise but projects with results.


We also worked on 1/4 leather albums as we thought it a good practise and important for the students to be able to work with different materials, to be able to extend the product range.


Tea break. Enough said I think.
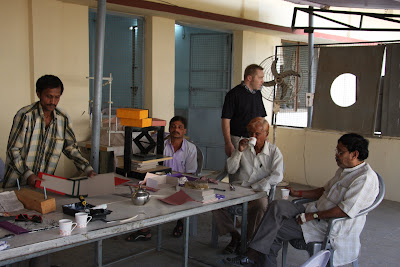


The next blog will dwell on the finishing of the leather bound albums, tooling with gold foil. Great fun in a hot climate.


Just one more image. As Anandwan is well known we were at times besieged with visitors. Imagine learning with hundreds of eyes following your every move, it is bad enough having me as the teacher.

Thursday 8 January 2009

Anandwan Book Cloth. Part Two.

Once the Formica work surface was spotless a small length of cotton fabric was damped out. Natural fabrics are best for making bookcloth and the damping out ensures that there are no wrinkles, eliminates the risk of water marks later on and keeps the fabric in contact with the work surface.

Next a piece of paper was glued out. The only available adhesive on site was a PVA 'Fevicole' turned out to be pretty good stuff. The paper was cut bigger than the cloth by 2cm on all edges.
The paper was then picked up using a ruler. This makes it much easier to handle the paper and gives far greater control when applying the paper to the cloth.
The paper is carefully placed over the cloth, ensuring that the glued surface goes toward the still damp cloth and that the 2cm overlap is equal.
The paper is tamped down using a hard bristle brush. This tamping down gets rid of air pockets and ensures that the paper has a good bond with the cloth.
The final tamp.
Along all four edges P V A was applied to the paper ( only for 1cm ) the whole lot is then peeled off the work surface......
..... then laid out cloth upermost.
The P V A along the edges of the paper are pressed down. This was/is important as it will make sure that the bookcloth will dry flat and become taught... like a drum skin. This technique is called drumming on... simple really. A small piece of waste paper is tucked under on egde of the paper, this will allow a knfe to be slipped under the dry bookcloth for easy removal from the work surface. Job done.
One of the nice things about teaching is when you see the student becoming the teacher and passing on the skills.
The next thing to do is to find a use for the book cloth.....

Wednesday 7 January 2009

Anandwan book cloth. Part One.

The students continued the box making, learning that it is not the amount of glue that you use but how you use it.


I had decided that the best way forward was to have a number of different work shops on the go at the same time. One of these separate work shops was how to make book cloth from an old sari.
As the work shop was open to the elements on three sides the first order of the day was to clean down the work surface.


After much elbow grease the demonstration began.
First is to find a suitable cloth. We found some cotton, which as with any natural fabric is perfect. This was place face down on to a Formica surface ( near enough any non porous surface will bo the job, in Studio 5 I tend to use a huge double glazing panel )