With the Man Booker binding and the studio members work taking up so much of my time, I have had so little time to do my own work. But, after much thought and a few pints of beer I was able to come up with a cunning box. Once it has been made I will tell all.
The days are becoming longer with the studio open longer so that the books for the Designer Bookbinders competition can be completed, I am so cheesed off with the organisers..... why leave everyone in the dark the for the hand in date ?. It is so unprofessional.
Thursday, 2 October 2008

Tuesday, 23 September 2008
Boxes and mental blocks.
Work on the Man Booker binding is going well (for those of you not following the progress reports.... tut, tut) However, that is not the only project on the go.
A little while ago I finished binding a commission, the next phase is to make the box. The box is important, not only does it protect the book it also identifies the book inside. As you may have noticed, a lot of bindings do not have the title on them, hence the title on the box being important.
It has been commented that I should have the title on the book as people like to know the contents. I refer to the box again and in any case with the sort of work I do, the collectors usually know exactly what is on their shelves.
My normal practise is to make a two tray drop back box ( Clam Shell ) However, it has been known for me to make box frames for wall display, boxes that are integrated with the book and other variations. I am bored with the two tray drop back box, there must be another way.
To be able to display and protect.............. the old gray cells are asleep.................... BOOKBINDERS BLOCK.
A little while ago I finished binding a commission, the next phase is to make the box. The box is important, not only does it protect the book it also identifies the book inside. As you may have noticed, a lot of bindings do not have the title on them, hence the title on the box being important.
It has been commented that I should have the title on the book as people like to know the contents. I refer to the box again and in any case with the sort of work I do, the collectors usually know exactly what is on their shelves.
My normal practise is to make a two tray drop back box ( Clam Shell ) However, it has been known for me to make box frames for wall display, boxes that are integrated with the book and other variations. I am bored with the two tray drop back box, there must be another way.
To be able to display and protect.............. the old gray cells are asleep.................... BOOKBINDERS BLOCK.
Monday, 15 September 2008
New students. Designer Bookbinders.....
Busy, busy. new students who may become studio members, exhibitions and prep work for forth coming work shops in Japan.
A number of the studio members are busy working on various competitions. First there is the Designer Bookbinders competition, an annual event. The problem this year is that the submission date was not know until after September the first..... The hand in date is the 11th of October, crazy, a full two weeks before last years date. I am sure the studio members will do their best. But why keep the closing date secret, surly it would have been in every one's interest to have the date available as soon as possible. Oh well....
The other competition is also organised by Designer Bookbinders and is international in nature. much hard work is being done by many, with some nice stuff being produced.
The Man Booker bindings are coming on. For up-dates on those bindings please refer to 'Diary of a Man Booker Binder'
Travel arrangements have been made for our next work shop in Anandwan, box making and some binding work. I would like to thank everyone who has made a contribution and will make a series of posts later on.
A number of the studio members are busy working on various competitions. First there is the Designer Bookbinders competition, an annual event. The problem this year is that the submission date was not know until after September the first..... The hand in date is the 11th of October, crazy, a full two weeks before last years date. I am sure the studio members will do their best. But why keep the closing date secret, surly it would have been in every one's interest to have the date available as soon as possible. Oh well....
The other competition is also organised by Designer Bookbinders and is international in nature. much hard work is being done by many, with some nice stuff being produced.
The Man Booker bindings are coming on. For up-dates on those bindings please refer to 'Diary of a Man Booker Binder'
Travel arrangements have been made for our next work shop in Anandwan, box making and some binding work. I would like to thank everyone who has made a contribution and will make a series of posts later on.
Wednesday, 10 September 2008
Waiting for Man Booker.
The Man Booker short list came out yesterday, for an update please log on to The diary of a Man Booker Binder (please see web sites below) So, while waiting for the sheets I continue with work on the bench. The book that has featured in a number of posts is now under-going gold tooling and black line work. Deep concentration and a steady hand.

Good natural light and time to rest the eyes are just two of the factors to be taken in to account. Not easy when the studio is full of members working on various projects of their own. Such is life. I would not have it any other way, the atmosphere is charged, the tea breaks are fun and new thoughts, ideas and concepts are batted around the studio like a cricket ball in a 20-twenty match.

Good natural light and time to rest the eyes are just two of the factors to be taken in to account. Not easy when the studio is full of members working on various projects of their own. Such is life. I would not have it any other way, the atmosphere is charged, the tea breaks are fun and new thoughts, ideas and concepts are batted around the studio like a cricket ball in a 20-twenty match.
Monday, 1 September 2008
On the Bench
Time is not on my side.
The Man Booker is creeping up and I still have work to do.....

Remember the spine cleaning entry from a few weeks ago ? Well this the same book being covered, all hand dyed with spirit dyes. I intend to have this finished by the end of the month.
An exhibition opens in a few days time at the SDC gallery ( please see links ) a top place and well worth a visit. More work shops in Japan at the end of next month and Anandwan in December. Time is not on my side.
The Man Booker is creeping up and I still have work to do.....

Remember the spine cleaning entry from a few weeks ago ? Well this the same book being covered, all hand dyed with spirit dyes. I intend to have this finished by the end of the month.
An exhibition opens in a few days time at the SDC gallery ( please see links ) a top place and well worth a visit. More work shops in Japan at the end of next month and Anandwan in December. Time is not on my side.
Saturday, 23 August 2008
The Joy of Shed.
It has been noted by some members of Studio 5 that I should get out more. It would appear that I spend too much time in the studio, surrounded by books, paper, leather, print stuff and the like.
On the very rare occasion that I do venture into the unknown, I am usually to be found in my local pub THE RED LION. It has the usual sprinkling of celebs (this is London after all) and a stream of musical people from the recording studio over the road. The Red Lion or RION as we call it has the benefit of only being some four minutes from the studio and only two roads to cross, plus there is a bus stop outside that has a top service, the bus journey home takes some four minutes with an additional six minutes walking to my front door. All of this makes it ideal.
A new addition to the services that the Rion provides is one that will appeal to many.
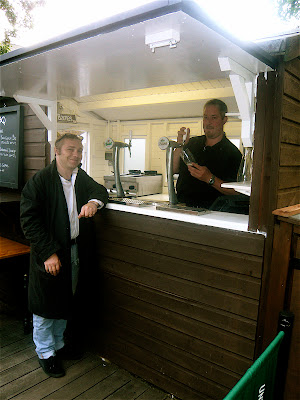
Yes, the Rion has opened the Beer and Barbie Shed in one of the beer gardens. I am most happy.
On the very rare occasion that I do venture into the unknown, I am usually to be found in my local pub THE RED LION. It has the usual sprinkling of celebs (this is London after all) and a stream of musical people from the recording studio over the road. The Red Lion or RION as we call it has the benefit of only being some four minutes from the studio and only two roads to cross, plus there is a bus stop outside that has a top service, the bus journey home takes some four minutes with an additional six minutes walking to my front door. All of this makes it ideal.
A new addition to the services that the Rion provides is one that will appeal to many.

Yes, the Rion has opened the Beer and Barbie Shed in one of the beer gardens. I am most happy.
Wednesday, 20 August 2008
Water book and other stuff.
As mentioned in a previous post I have been working on a number of separate projects, one of which 'water' is very nearly finished. Water is the title of the Designer Bookbinders international competition book. I do wish I could show you pictures but I fear that may be against the rules of the competition.

However, the rules say nothing about work in progress. Hand dieing the leather.
One of the other books on the bench is a commission, great stuff and fun to work on.

First business of the day is to remove the old binding, a full cloth case binding with lots of wear and tear and sun damage. This must be done with lots of care. Any of the spine linings that can be removed dry are done so.

Next is the messy bit. The various mulls, paper and old adhesive, animal or hot glue are removed. I do this by applying a small amount of paste to the spine area and encapsulate in cling film. I retire to a safe distance for a few minutes..... have a cup of tea or something.

After a few minutes I return to the book to see if the layers of stuff have become soft and are able to be removed with the minimum of effort. This is not because I am lazy, more it is to ensure that when I do remove the mull etc, I will be causing the minimum of damage to the spine or the outer folds of the sections.

I gently remove the loose material with the flat end of one of my bone folders. As soon as I encounter an area that is not loose I re-apply some more paste, cover with cling film and repeat until the spine is clear of all the spine linings.

All of this can take sometime, it can not be rushed. A lot depends on the choice of materials the original binder used, how old was the glue, was he or she having a bad hair day, was it done late on a Friday afternoon, that sort of thing. The secret is to take your time, do not let it get to you, time spent doing this aspect of any re-binding work work is time well spent as it will make life much easier for the next processes.
One of the pleasures of being able to teach is when a student is able to realise a goal or ambition. During my last visit to Japan I had the great pleasure of being invited to the studio bindery of AYA NISHIO. Aya's work is fantastic and I hope to be able to include her contact details on the Studio 5 blog. Her place is very her, very correct, tidy with lots of different stuff happening. Her needle cushions are very note worthy.


However, the rules say nothing about work in progress. Hand dieing the leather.
One of the other books on the bench is a commission, great stuff and fun to work on.

First business of the day is to remove the old binding, a full cloth case binding with lots of wear and tear and sun damage. This must be done with lots of care. Any of the spine linings that can be removed dry are done so.

Next is the messy bit. The various mulls, paper and old adhesive, animal or hot glue are removed. I do this by applying a small amount of paste to the spine area and encapsulate in cling film. I retire to a safe distance for a few minutes..... have a cup of tea or something.

After a few minutes I return to the book to see if the layers of stuff have become soft and are able to be removed with the minimum of effort. This is not because I am lazy, more it is to ensure that when I do remove the mull etc, I will be causing the minimum of damage to the spine or the outer folds of the sections.

I gently remove the loose material with the flat end of one of my bone folders. As soon as I encounter an area that is not loose I re-apply some more paste, cover with cling film and repeat until the spine is clear of all the spine linings.

All of this can take sometime, it can not be rushed. A lot depends on the choice of materials the original binder used, how old was the glue, was he or she having a bad hair day, was it done late on a Friday afternoon, that sort of thing. The secret is to take your time, do not let it get to you, time spent doing this aspect of any re-binding work work is time well spent as it will make life much easier for the next processes.
One of the pleasures of being able to teach is when a student is able to realise a goal or ambition. During my last visit to Japan I had the great pleasure of being invited to the studio bindery of AYA NISHIO. Aya's work is fantastic and I hope to be able to include her contact details on the Studio 5 blog. Her place is very her, very correct, tidy with lots of different stuff happening. Her needle cushions are very note worthy.

Wednesday, 13 August 2008
Tea break chat
During one of the few tea breaks in the studio (we like to work) we embarked on a topic that is very close to my heart.
Technique over Art. The general opinion was that many of the established fine designer bookbinders, in the Uk at least, was that some are perhaps not able understand the art of the book.
By this I mean that though good technique is important, the function of the book (within the realm of fine, designed bindings) is not compromised. That the manipulation of the materials, surface decoration and over all impression of the book works as a whole.
Where this can fall down is when the technique becomes the important thing. I am sure that we have all looked at a fine binding, perhaps by a 'Master' that is a self masturbatory exercise in technique. The sort of work that the viewers look at the work and say something like ' oh he/she is so good at...........' what the viewer is saying is key. That the technique has overtaken and suppresses the art. The 'master' on hearing this sticks out their chest, and with a smug look thinks themselves to be the best. It is easy to see how they can start to believe their own press, to produce work that is a series of banal exercises. In the end creating wall paper. As this 'master' begins to get a gather a sycophantic and vocal clique, more and more people are beguiled into believing the press and aping the 'master' thus propagating the myth.
One of the potential problems is that when this 'master is then paraded as being the best, it can stifle true creativity within the genre. For the binder who acknowledges the technical skill and strives to perfect their own but also balances this with the art of the book, life can be difficult. It would seam that this binder is going against the norm, being a bad boy/girl of the bookbinding world.
The banal has become the expected norm, anything that bucks that norm is castigated, derided as being non bookbinding, as not respecting the craft of the genre - not being true to the tradition. The banal 'master' is safe in the knowledge that his or her status is safe, that their individual approach to the art and craft of the book is the only one of any merit.
This is surely bad for any binder who wants to move forward, to be able to express what they are able to draw from the text, to be able to share with others the art of the book. The banal sycophant is unable to understand the work as it is not what they have been told is correct, therefore, in their eyes, it is not correct. There is also the case of the of the sycophant rejecting the work as worthless, as their work apes the 'master' and must be the correct form.
The general opinion in the studio was that there has to be a healthy balance between the trad and the contemporary, that the 'master' should recognise and applaud the new work as should the young bloods recognise the contribution that the 'master' has made in the past. The sycophants should get their faces out of the 'masters' arse and get a life.
Thus the rest period ended and work resumed.
Technique over Art. The general opinion was that many of the established fine designer bookbinders, in the Uk at least, was that some are perhaps not able understand the art of the book.
By this I mean that though good technique is important, the function of the book (within the realm of fine, designed bindings) is not compromised. That the manipulation of the materials, surface decoration and over all impression of the book works as a whole.
Where this can fall down is when the technique becomes the important thing. I am sure that we have all looked at a fine binding, perhaps by a 'Master' that is a self masturbatory exercise in technique. The sort of work that the viewers look at the work and say something like ' oh he/she is so good at...........' what the viewer is saying is key. That the technique has overtaken and suppresses the art. The 'master' on hearing this sticks out their chest, and with a smug look thinks themselves to be the best. It is easy to see how they can start to believe their own press, to produce work that is a series of banal exercises. In the end creating wall paper. As this 'master' begins to get a gather a sycophantic and vocal clique, more and more people are beguiled into believing the press and aping the 'master' thus propagating the myth.
One of the potential problems is that when this 'master is then paraded as being the best, it can stifle true creativity within the genre. For the binder who acknowledges the technical skill and strives to perfect their own but also balances this with the art of the book, life can be difficult. It would seam that this binder is going against the norm, being a bad boy/girl of the bookbinding world.
The banal has become the expected norm, anything that bucks that norm is castigated, derided as being non bookbinding, as not respecting the craft of the genre - not being true to the tradition. The banal 'master' is safe in the knowledge that his or her status is safe, that their individual approach to the art and craft of the book is the only one of any merit.
This is surely bad for any binder who wants to move forward, to be able to express what they are able to draw from the text, to be able to share with others the art of the book. The banal sycophant is unable to understand the work as it is not what they have been told is correct, therefore, in their eyes, it is not correct. There is also the case of the of the sycophant rejecting the work as worthless, as their work apes the 'master' and must be the correct form.
The general opinion in the studio was that there has to be a healthy balance between the trad and the contemporary, that the 'master' should recognise and applaud the new work as should the young bloods recognise the contribution that the 'master' has made in the past. The sycophants should get their faces out of the 'masters' arse and get a life.
Thus the rest period ended and work resumed.
9th of September
The 9th of September is the announcement of the man Booker short list, be sure to visit my Diary of a Man Booker Binder.
Monday, 4 August 2008
Coming Soon to a Blog Near You.
It is fast coming up to the time of year when the book world, in the U K at least, becomes Man Booker mad.
The Man Booker award is a celebration of the last years literary out-put and ends with a huge slap up meal, complete with the BBC, interviews, winners and not so winners.
Each one of the six finalists is presented with a cheque for a few grand ( the winner gets a huge cheque ) and a presentation copy of their book.
It is my pleasure to have been selected to be one of the Man Booker binders for this year. I have created a blog site
'Diary of a Man Booker Binder' and will keep you up to date with all the highs and lows in the four or so weeks I have in which to do the binding.
I hope that it will offer an insight in to a little known part of the Man Booker awards and for those who are interested in the art and craft of book binding and arts a glimpse of what it takes to make a Designed Binding.
The Man Booker award is a celebration of the last years literary out-put and ends with a huge slap up meal, complete with the BBC, interviews, winners and not so winners.
Each one of the six finalists is presented with a cheque for a few grand ( the winner gets a huge cheque ) and a presentation copy of their book.
It is my pleasure to have been selected to be one of the Man Booker binders for this year. I have created a blog site
'Diary of a Man Booker Binder' and will keep you up to date with all the highs and lows in the four or so weeks I have in which to do the binding.
I hope that it will offer an insight in to a little known part of the Man Booker awards and for those who are interested in the art and craft of book binding and arts a glimpse of what it takes to make a Designed Binding.
Sunday, 3 August 2008
Sunday at home.
The first day off. No work and no meetings to attend, bliss. The last few days have been busy with teaching a wonderful group of students.

Language is a funny thing, most of the class could sort of understand me and I could sort of understand them.

Simple things such as threading and locking a needle can be a theatre piece in the round. As with many art and design courses, the students have only limited access to the world of book arts and bookbinding. However, in very few days we were able to make three books. Each book exploring different construction details, fusion binding, print and page layout.

All of this was done with only rudimentary studio tools and a few bone folders and brushes from Studio 5. Great fun, hard work and I hope to be able to show you some of the work at a later date. A lot of the images and text was worked by hand with only a few of the students electing to use the computer.

Language is a funny thing, most of the class could sort of understand me and I could sort of understand them.

Simple things such as threading and locking a needle can be a theatre piece in the round. As with many art and design courses, the students have only limited access to the world of book arts and bookbinding. However, in very few days we were able to make three books. Each book exploring different construction details, fusion binding, print and page layout.

All of this was done with only rudimentary studio tools and a few bone folders and brushes from Studio 5. Great fun, hard work and I hope to be able to show you some of the work at a later date. A lot of the images and text was worked by hand with only a few of the students electing to use the computer.
Friday, 1 August 2008
In Japan
At last, a free couple of hours.
A couple of images to keep you going. They include a number of my favorite things.

Liver and chicken in my top pub in Tokyo.

At the counter in my fave Sushi restaurant.
A couple of images to keep you going. They include a number of my favorite things.

Liver and chicken in my top pub in Tokyo.

At the counter in my fave Sushi restaurant.
Thursday, 24 July 2008
Rat skins, competitions and the Man Booker awards.

As promised, the Rat Skins.
Cute are they not ?
Along with the usual stuff that happens in Studio 5 I have been working on a competition book ( The first comp in ages). The title is 'Water' and is basically a collection of images and words connected with.......wait for it..........water.
I would love to show you the images, but I think I may be breaking the rules if I did. I will show you later.
Other news from the studio.....
I am one of this years Man Booker binders. For those of us who are new to all of this the Man Booker is as follows;
Towards the end of the year there is an award ceremony for the good and the great in the world of literary wonderfulness at some swanky venue in London town. Each one of the six finalists receives a designed binding of their tome. It is sponsored by the Man Group and was started ( I think) by the Booker Group, hence the Man Booker awards. Simple. As things develop I will keep you up to date. The long list is out at the weekend if you are really keen.
Oh yes, I am off to Japan for a few days.... work and family.
Thursday, 17 July 2008
A book of Rats.
I must admit that this subject is not one of the most popular and may even raise the odd eyebrow.
It all starts with my Father. He lives in the country in a rambling Strawberry Hill Gothic house. A lovely place. Being in the country he has a shot gun, a Darn (French) 16 bore, a top piece of kit.
One of the reasons for the shot gun, along with providing food for the table is to keep vermin down. I realise that in the right areas rats have their place, often making good companions. I think it would be safe to say that anyone who lives in the country or has had to live with an infestation of rats may offer a different opinion.
After a couple of nights out my father managed to bag a number of the rodents. He skinned them, and tawed them (an ancient method of curing skins- similar to tanning)
All of this and a text about rats was then placed in my lap, with instructions to do something with them. I love a challenge.
It all starts with my Father. He lives in the country in a rambling Strawberry Hill Gothic house. A lovely place. Being in the country he has a shot gun, a Darn (French) 16 bore, a top piece of kit.
One of the reasons for the shot gun, along with providing food for the table is to keep vermin down. I realise that in the right areas rats have their place, often making good companions. I think it would be safe to say that anyone who lives in the country or has had to live with an infestation of rats may offer a different opinion.
After a couple of nights out my father managed to bag a number of the rodents. He skinned them, and tawed them (an ancient method of curing skins- similar to tanning)
All of this and a text about rats was then placed in my lap, with instructions to do something with them. I love a challenge.
Sunday, 13 July 2008
Rats.
For my next book I shall be mainly using Rat Skin.
I will explain more in the next blog.
It is a long and exciting story.
I will explain more in the next blog.
It is a long and exciting story.
Friday, 11 July 2008
Magic Books From Mexico is finished.
Magic Books From mexico is finished.
A full hand dyed leather binding with on-lays and in-lays.


Detail of the back board.

Detail of the front board.

Leather jointed end-papers and doublers.
A full hand dyed leather binding with on-lays and in-lays.


Detail of the back board.

Detail of the front board.

Leather jointed end-papers and doublers.
Tuesday, 8 July 2008
Beneath The Skin - One Technique Of Binding Part 2
Part 2.
For those of us who are late joining the demo please start at the previous blog entry.
We begin with board attachment. The trad way of doing this involves the making of holes or slits, much fraying out of tapes, de-lamination of boards and much hammering.
It must also be noted that in the trad context the end bands are worked after the boards have been laced-on, this involves a lot of extra work and in my opinion, can be a waste of time.
Back to the plot.

Boards are cut to the correct size, squares and the like. Tabs of water colour paper, about 0.5mm thick, 2-3cm long and the same depth of the boards are glued to the spine edge of the boards ( 2 per board equally spaced)

The boards are put in to position, equal squares at the head and tail - the fore edge will look after itself. I use a number of different methods of ensuring that the boards are in the correct place, you could find your own !

To ensure a good bond, the Fray not and board is covered with a sheet of water colour paper 200gsm -240gsm using PVA. To counter the pull I always use archival kraft paper to the inner board. Tins are inserted, the whole is then press till dry.

Detail of how the tabs help keep the fore edge square and the all important space between the spine edge of the board and the shoulder.

We now turn our attention to the spine area. A leather skirt is glued to the head and tail of the spine. the skirt goes over the end bands and down the spine for some 3cm, the ears are trimmed in line with the end bands. the leather thickness is determined by the size and weight of the book. the bigger the book the thicker the leather has to be. This is due to the number of folds in the hollow. the larger the book, the more folds are required to offer the correct support eg; 2 on 1 off or 3 on 1 off. I make the hollow off the book and trim to fit between the skirting.

Please excuse the fluff. Detail of the skirting and the hollow, in this case 2 on 1 off. Please note, I have not had to load the spine with layers of paper and then sand it smooth to cover the problems of sewing on tapes or flat cords. This method ensures that the book ... wait for it .... OPENS.

The final spine lining is a laminate of manila and 200gsm water colour paper. this is cut to fit the spine width ways and a few centimeters longer that the full height of the spine.

This spine piece is adhered to the hollow only and worked over with the bone folder. I then secure the book in a finishing press and wrap the whole lot in an elasticated support bandage until dry.

Once dry, the boards can then be sanded to the desired finish. Remember to wear a good face mask for this.

The spine is then sanded. This is important as there may be one or two very small lumps and bumps that may not be required. Please note that the height of the spine piece has been marked up. It is easier to cut the spine piece to the correct height through the sanded spine thickness than the manila - water colour laminate.

The last thing to do before the covering is back cornering. Just cut through the fray not for 3cm at head and tail, insert ruler and make a beveled cut using a straight bladed knife.
Simple stuff eh ?
Experience is a wonderful thing and can only be gained through practise. As I am sure you can realise, I have missed out a lot of the small details and numerous tips and tricks.
This is only one way and it works for me and the Studio 5 members. It may not work for you. If you would like to now more...join one of our work shops.
Failing that, I am to give a class for the Designer Bookbinders/Society of Bookbinders early next year... Check out the S O B web site (see links) for details.
For those of us who are late joining the demo please start at the previous blog entry.
We begin with board attachment. The trad way of doing this involves the making of holes or slits, much fraying out of tapes, de-lamination of boards and much hammering.
It must also be noted that in the trad context the end bands are worked after the boards have been laced-on, this involves a lot of extra work and in my opinion, can be a waste of time.
Back to the plot.

Boards are cut to the correct size, squares and the like. Tabs of water colour paper, about 0.5mm thick, 2-3cm long and the same depth of the boards are glued to the spine edge of the boards ( 2 per board equally spaced)

The boards are put in to position, equal squares at the head and tail - the fore edge will look after itself. I use a number of different methods of ensuring that the boards are in the correct place, you could find your own !

To ensure a good bond, the Fray not and board is covered with a sheet of water colour paper 200gsm -240gsm using PVA. To counter the pull I always use archival kraft paper to the inner board. Tins are inserted, the whole is then press till dry.

Detail of how the tabs help keep the fore edge square and the all important space between the spine edge of the board and the shoulder.

We now turn our attention to the spine area. A leather skirt is glued to the head and tail of the spine. the skirt goes over the end bands and down the spine for some 3cm, the ears are trimmed in line with the end bands. the leather thickness is determined by the size and weight of the book. the bigger the book the thicker the leather has to be. This is due to the number of folds in the hollow. the larger the book, the more folds are required to offer the correct support eg; 2 on 1 off or 3 on 1 off. I make the hollow off the book and trim to fit between the skirting.

Please excuse the fluff. Detail of the skirting and the hollow, in this case 2 on 1 off. Please note, I have not had to load the spine with layers of paper and then sand it smooth to cover the problems of sewing on tapes or flat cords. This method ensures that the book ... wait for it .... OPENS.

The final spine lining is a laminate of manila and 200gsm water colour paper. this is cut to fit the spine width ways and a few centimeters longer that the full height of the spine.

This spine piece is adhered to the hollow only and worked over with the bone folder. I then secure the book in a finishing press and wrap the whole lot in an elasticated support bandage until dry.

Once dry, the boards can then be sanded to the desired finish. Remember to wear a good face mask for this.

The spine is then sanded. This is important as there may be one or two very small lumps and bumps that may not be required. Please note that the height of the spine piece has been marked up. It is easier to cut the spine piece to the correct height through the sanded spine thickness than the manila - water colour laminate.

The last thing to do before the covering is back cornering. Just cut through the fray not for 3cm at head and tail, insert ruler and make a beveled cut using a straight bladed knife.
Simple stuff eh ?
Experience is a wonderful thing and can only be gained through practise. As I am sure you can realise, I have missed out a lot of the small details and numerous tips and tricks.
This is only one way and it works for me and the Studio 5 members. It may not work for you. If you would like to now more...join one of our work shops.
Failing that, I am to give a class for the Designer Bookbinders/Society of Bookbinders early next year... Check out the S O B web site (see links) for details.
Beneath The Skin - One Technique Of Binding
I have just realised that I have offered lots of images of how I cover books, decorative techniques and the like. However that is only half the story. What happens beneath the skin is as important, one could argue more so as the structure of the book must be sound. By that I mean that if the structure is defective, it does not matter what the finished look of the book is like as it will either not function correctly and in some cases fall apart.
I would like to offer an introduction in one of the methods of making a book employed in studio 5. I apologise if some of the terminology is unfamiliar and that I take for granted that you will have some existing knowledge. You could always go to my web site to find out about the work shops I run.
The binding we shall be looking at is in 1/4 leather with leather jointed made end papers. Other areas we shall be looking at will be end banding, Manhattaning, 3/4 hollow and secondary sewing.
Here we go..........

We will take it that we have made our hooked on end papers, trimmed to size with waste sheet. Good sewing is the key to book binding, as this book is to be rounded and backed the correct thread must be chosen to achieve the correct swell. I use a micrometer to measure the section and thread thickness (to explain this aspect would take some time and space, perhaps I will do a separate blog on it later) The marking of the sewing positions is done with a Gabarit de Grecquage. I always mark up the text block with a point line...never a pencil as the graphite will make the thread, hands and the text block dirty.
I tend to use an unsupported link stitch as apposed to tapes or cords as this reduces the amount of lumps and bumps on the spine area.

Once sewn, the text block is knocked up to head and spine and placed in a finishing press with working boards. The working boards are beveled to wards the spine edge to accommodate the swell. The spine is glued up with a mixture of PVA and paste.
Once the adhesive is dry, we move on to rounding and backing.

The text block is released from the press and the working boards and the spine dampended. This is to make the adhesive pliable whilst still bonding the sections together. The spine is gentle moulded with a hammer to produce a round. This has to be done with care as the sections can be damaged with careless blow with the hammer. I must add that I only use this technique with a text block that has a deckle edge, otherwise I would use a roller.
The depth of joint is marked on the shoulder, the text block is then ready for backing.

The text block is placed in the laying press between backing boards. I use a French press with French backing boards as I find it easier than the two screw press and trad backing boards. The depth of joint marks made earlier should only serve as a guide as the text block has a natural swell. The sections are gently manipulated with a hammer, again great care must be taken to achieve the correct shape.

When the spine is correct it is allowed to dry in the backing press.

On removal from the backing press the text block is placed between the working boards and the shoulders worked over with a bone folder. This important as it crisps up the shoulder shape. Next comes the first of the spine linings.

The first of the linings is Fray Not, glued to the spine With PVA. This is a light weight but very strong fabric. It is important to remember that the choice of the fabric is crucial to the size, the end use of the book and weight of the text block. For larger books I would use Aero Linen, I have even used old linen hospital sheets ! Experience is the only answer.

Next is secondary sewing, we use this technique a lot in Studio 5, it is a top thing. I am sorry, this aspect of the structure is difficult to explain. The fabric is sewn on to the text block, in this case, the first two and last two sections. If the book is larger then the first and last three sections along with some in the middle. The thread used for the secondary sewing should be either the same as the initial sewing or thinner. Coloured thread can be used to match the end banding.

The Fray Not is pinked in to a semi circle.

End banding, enough said. There are so many ways, so many cores just so much. This particular example is a single round core, sewn with a Japanese silk in a single colour. Once the end band has been set with PVA, I tape it in place with a low tack craft tape (masking tape) to let it dry following the shape of the spine. The ends of the core are then trimmed and set with PVA.

Board attachment. In the trad context this involves lots of holes or slits, lots of lacing on, delaminating. The lecture will continue tomorrow.
I would like to offer an introduction in one of the methods of making a book employed in studio 5. I apologise if some of the terminology is unfamiliar and that I take for granted that you will have some existing knowledge. You could always go to my web site to find out about the work shops I run.
The binding we shall be looking at is in 1/4 leather with leather jointed made end papers. Other areas we shall be looking at will be end banding, Manhattaning, 3/4 hollow and secondary sewing.
Here we go..........

We will take it that we have made our hooked on end papers, trimmed to size with waste sheet. Good sewing is the key to book binding, as this book is to be rounded and backed the correct thread must be chosen to achieve the correct swell. I use a micrometer to measure the section and thread thickness (to explain this aspect would take some time and space, perhaps I will do a separate blog on it later) The marking of the sewing positions is done with a Gabarit de Grecquage. I always mark up the text block with a point line...never a pencil as the graphite will make the thread, hands and the text block dirty.
I tend to use an unsupported link stitch as apposed to tapes or cords as this reduces the amount of lumps and bumps on the spine area.

Once sewn, the text block is knocked up to head and spine and placed in a finishing press with working boards. The working boards are beveled to wards the spine edge to accommodate the swell. The spine is glued up with a mixture of PVA and paste.
Once the adhesive is dry, we move on to rounding and backing.

The text block is released from the press and the working boards and the spine dampended. This is to make the adhesive pliable whilst still bonding the sections together. The spine is gentle moulded with a hammer to produce a round. This has to be done with care as the sections can be damaged with careless blow with the hammer. I must add that I only use this technique with a text block that has a deckle edge, otherwise I would use a roller.
The depth of joint is marked on the shoulder, the text block is then ready for backing.

The text block is placed in the laying press between backing boards. I use a French press with French backing boards as I find it easier than the two screw press and trad backing boards. The depth of joint marks made earlier should only serve as a guide as the text block has a natural swell. The sections are gently manipulated with a hammer, again great care must be taken to achieve the correct shape.

When the spine is correct it is allowed to dry in the backing press.

On removal from the backing press the text block is placed between the working boards and the shoulders worked over with a bone folder. This important as it crisps up the shoulder shape. Next comes the first of the spine linings.

The first of the linings is Fray Not, glued to the spine With PVA. This is a light weight but very strong fabric. It is important to remember that the choice of the fabric is crucial to the size, the end use of the book and weight of the text block. For larger books I would use Aero Linen, I have even used old linen hospital sheets ! Experience is the only answer.

Next is secondary sewing, we use this technique a lot in Studio 5, it is a top thing. I am sorry, this aspect of the structure is difficult to explain. The fabric is sewn on to the text block, in this case, the first two and last two sections. If the book is larger then the first and last three sections along with some in the middle. The thread used for the secondary sewing should be either the same as the initial sewing or thinner. Coloured thread can be used to match the end banding.

The Fray Not is pinked in to a semi circle.

End banding, enough said. There are so many ways, so many cores just so much. This particular example is a single round core, sewn with a Japanese silk in a single colour. Once the end band has been set with PVA, I tape it in place with a low tack craft tape (masking tape) to let it dry following the shape of the spine. The ends of the core are then trimmed and set with PVA.

Board attachment. In the trad context this involves lots of holes or slits, lots of lacing on, delaminating. The lecture will continue tomorrow.
Sunday, 6 July 2008
More of Magic Books From Mexico
At last the outer of Magic Books From Mexico is complete ( I think )

There may be a few tweaks before the book is put to bed but in the main I am happy. is it bad form to like ones own work ? I do not think so.

Detail of the back board.

Detail of the front board.

There may be a few tweaks before the book is put to bed but in the main I am happy. is it bad form to like ones own work ? I do not think so.

Detail of the back board.

Detail of the front board.
Wednesday, 2 July 2008
Magic Books From Mexico
Having put in the leather joints and in-filled the boards I can set about tooling.

The lines are first 'blinded in' with a hot brass tool, with the colour being added with a technical pen. Once the water proof ink has dried I re-apply the heated tool to set everything in place.

I tend to make my own tools as I can alter them to suit the individual book I am working on. In total, only three tools have been used, one being as small as 1 1/2mm (to go around tight corners) through to 7mm for the straight line work.

The sightly uneven line is important as it produces a less mechanical line. All to often I see tooling that is well done but somehow lacks grace and individuality. One can not help think that the crafts person is just using technique to show off with, the regimented lines, dots and centre tools being placed with anal attention, producing nothing more than gold wall paper with little or no relevance to the text block.

Detail showing the number of tool marks, thickness of line - tension etc

The lines are first 'blinded in' with a hot brass tool, with the colour being added with a technical pen. Once the water proof ink has dried I re-apply the heated tool to set everything in place.

I tend to make my own tools as I can alter them to suit the individual book I am working on. In total, only three tools have been used, one being as small as 1 1/2mm (to go around tight corners) through to 7mm for the straight line work.

The sightly uneven line is important as it produces a less mechanical line. All to often I see tooling that is well done but somehow lacks grace and individuality. One can not help think that the crafts person is just using technique to show off with, the regimented lines, dots and centre tools being placed with anal attention, producing nothing more than gold wall paper with little or no relevance to the text block.

Detail showing the number of tool marks, thickness of line - tension etc
Subscribe to:
Posts (Atom)